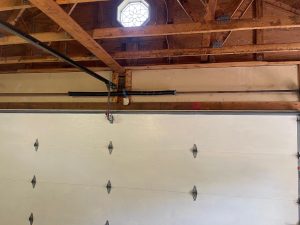

You’d think a garage door opener would just work. Press the button, it opens. Press it again, it closes. Simple. But when it stops responding—or worse, starts doing its own thing—the first instinct is usually to panic and call for help. And sometimes that’s the right call. But more often than not, the issue is something you can track down yourself in about ten minutes with a ladder and a little patience. We’ve seen enough of these calls over the years to know exactly where people go wrong, and where they waste money on service visits for problems they could have solved with a pair of pliers.
So let’s walk through this like you’re standing in front of your opener with us. No jargon for the sake of it. Just the real stuff we’ve seen fail, fixed, and sometimes made worse by well-meaning homeowners.
Key Takeaways
- Most opener failures are caused by power, sensor, or limit switch issues—not a dead motor.
- A simple visual inspection of the track, springs, and wiring can save you a service call fee.
- If the opener runs but the door doesn’t move, the problem is almost always mechanical, not electrical.
- Safety sensors are the most common culprit for a door that reverses for no apparent reason.
- Professional help is warranted when you suspect a circuit board failure or a broken spring—both require specialized tools and experience.
The First Thing to Check: Is It Getting Power?
We know this sounds obvious, but you’d be surprised how many times we’ve shown up to a house where the opener was unplugged or a breaker had tripped and nobody noticed. Before you do anything else, look at the opener unit on the ceiling. Is there a light on? Any blinking? If it’s completely dark, check the outlet. Sometimes a plug gets knocked loose when someone’s moving stuff around in the garage. Other times, a GFCI outlet has tripped—common in garages built after the early 2000s.
If the unit has power but the wall button doesn’t work, try the remote. If the remote works but the wall button doesn’t, you’ve got a bad wall switch or a broken wire in the wall. That’s a cheap fix. If neither works, move on to the next step.
The Safety Sensor Dance
Here’s the thing about safety sensors—they’re required by law on all openers made after 1993, and they’re the single most common reason an opener stops working properly. Those little boxes mounted on each side of the door about six inches off the ground? Yeah, those. They send an invisible beam across the opening. If anything breaks that beam while the door is closing, the opener reverses. If the sensors are misaligned, dirty, or one of them has a loose wire, the door may refuse to close at all.
We’ve seen people replace their entire opener because they didn’t realize a cobweb was blocking one sensor. Seriously. Clean the lenses with a dry cloth. Make sure both sensor lights are glowing steadily—not blinking. If one is off or flickering, check the wires. A staple through the wire is a classic problem in garages where people ran the wire along the wall and accidentally pierced it. That happens more than you’d think.
When the Door Reverses for No Reason
If the door goes down a few inches and then pops back up, the sensors are the first suspect. But there’s another possibility: the force setting on the opener is too sensitive. Most openers have a dial or screw adjustment for force and travel limits. If the door encounters even slight resistance—sticky tracks, a warped section, cold weather making the springs stiff—the opener might interpret that as an obstruction and reverse. This is especially common in winter on Long Island, where temperature swings can affect the metal and lubricant. Before you call us, try increasing the closing force slightly. Just don’t go overboard—you still want the safety system to work.
Limit Switch Confusion
The limit switches tell the opener when to stop. If your door opens only partway, or closes but doesn’t seal at the bottom, the limit settings are off. This is an easy fix on most modern openers. There’s usually a pair of plastic screws or dials labeled “open” and “close.” Turn the close limit a quarter turn clockwise to make the door go lower. Turn the open limit to adjust how high it goes. It’s trial and error, but it’s free.
We’ve seen people replace their opener because they thought the motor was dying, when all they needed was a half-turn on a plastic screw. That’s the kind of thing that makes us wince. Not because we lost a job—but because it’s such an unnecessary expense.
What About the Travel Module?
On chain-drive and belt-drive openers, there’s often a separate travel module that controls the exact stopping points. If that module goes bad, the opener might stop randomly or run forever until it hits the mechanical stop. That’s a specific failure that usually requires replacing the module or the whole logic board. But before you go that route, check the simple stuff. We’ve seen a loose chain cause the travel module to misread position, leading to erratic behavior. Tighten the chain first. If it’s sagging more than half an inch, that’s your problem.
When the Motor Runs but the Door Doesn’t Move
This one scares people. You press the button, you hear the motor humming, but the door just sits there. Most folks assume the opener is shot. But nine times out of ten, the problem is mechanical. The trolley—the part that connects the opener arm to the door—might have disengaged. Check the red emergency release cord. If it’s been pulled, the trolley is in manual mode. Push the door closed and pull the cord again to re-engage. If that doesn’t work, the carriage might be jammed.
If the trolley is engaged and the motor still won’t move the door, look at the drive mechanism. On a chain-drive opener, the chain might have snapped or slipped off the sprocket. On a belt-drive, the belt could be broken. On a screw-drive, the screw might be worn or binding. These are all repairable, but they require some disassembly. If you’re comfortable with a socket set, you can replace a chain or belt yourself. If not, this is where you call us.
A Quick Word on Springs
We have to say this because we’ve seen the aftermath: do not mess with torsion springs. They’re under extreme tension—thousands of pounds of force. If a spring breaks, the door won’t move even if the opener is fine. That’s not an opener problem; that’s a spring problem. And it’s not a DIY job unless you’ve got the proper winding bars and know exactly what you’re doing. We’ve had customers try to save money by replacing springs themselves, and it’s ended with ER visits. Please don’t. Call a professional for springs.
Remote and Keypad Issues
Sometimes the opener works fine from the wall button but not from the remote. That’s usually a remote problem, not an opener problem. Replace the battery first. If that doesn’t work, you might need to reprogram the remote. The process varies by brand, but it’s usually something like: press the learn button on the opener (often a small colored button behind the light lens), then press the remote button within 30 seconds. If the opener blinks, you’re paired.
Keypads fail more often than remotes, especially if they’re exposed to rain or direct sunlight. The buttons get sticky, the circuit board corrodes. A new keypad is about $30 and takes five minutes to install. Don’t replace the whole opener for a bad keypad.
Interference from Neighbors or Devices
This is becoming more common as neighborhoods get denser and everyone has Wi-Fi, Bluetooth, and smart home devices. If your opener works intermittently, especially at certain times of day, radio frequency interference could be the cause. Modern openers use rolling codes to prevent hacking, but they can still get overwhelmed by strong signals. Try moving the antenna wire on the opener to a different position—sometimes just pointing it away from a metal shelf or a Wi-Fi router helps. If that doesn’t work, you might need an external antenna or a frequency-shifting module.
When to Throw in the Towel
Not every opener is worth fixing. If your unit is more than 15 years old and the motor is failing, replacement often makes more sense than repair. The new openers are quieter, safer, and have better features like battery backup and smartphone control. Plus, parts for old models get harder to find. We’ve had customers spend $200 on a circuit board for a 20-year-old opener, only to have the motor die six months later. That’s not a win.
But for most common failures—sensor misalignment, limit adjustments, remote reprogramming, chain tensioning—you can handle it yourself in under an hour. The tools you need are basic: a screwdriver, a step ladder, maybe a pair of pliers. No special training required.
A Real-World Example from Long Island
We had a call last winter from a homeowner in Nassau County. His door wouldn’t close all the way. He’d already called another company that quoted him $400 for a new opener. He asked us for a second opinion. We walked in, looked at the sensors, and one was tilted about five degrees because the bracket had worked loose. We tightened the bracket with a Phillips screwdriver, realigned the sensor, and the door closed perfectly. Total time: four minutes. Total cost: zero. He offered to pay us for the visit, but we told him to buy us a coffee next time. That’s the kind of thing we mean when we say most opener problems are simple.
If you’re in the Long Island area and you’ve tried all the steps above and the door still won’t cooperate, that’s when you call Alo Garage Doors. We’ve seen it all—from broken circuit boards to doors that somehow got bent out of shape by a kid’s basketball hoop. But we’d rather you try the easy stuff first. It saves you time and money, and it keeps us from feeling like we’re charging you for something you could have done yourself.
The Bottom Line on Opener Diagnostics
Garage door openers are not mysterious machines. They’re simple electromechanical devices with a handful of common failure points. Power, sensors, limits, remote, drive mechanism—that’s about it. If you approach the problem methodically, you can solve most issues without spending a dime. And if you can’t, you’ll at least know exactly what to tell the technician when you call, which saves everyone time.
The biggest mistake we see is people assuming the worst. “It must be the motor.” “It must be the circuit board.” Nine times out of ten, it’s not. It’s a dirty sensor or a loose wire or a limit that drifted over time. So grab a ladder, take a look, and give it a shot. You might surprise yourself.
And if all else fails, we’re just a phone call away. That’s what we’re here for.